Okta
To setup Okta for SSO, you can install our application from Okta's OIN. Once you have completed the necessary steps to install our application, navigate to under Settings → OpenID Connector in Cortex, fill out the form, and save.
Finding the Issuer URI
Instructions for finding your Okta issuer URI can be found here. It should look like https://{okta domain}.okta.com
Finding the Client ID and Client Secret
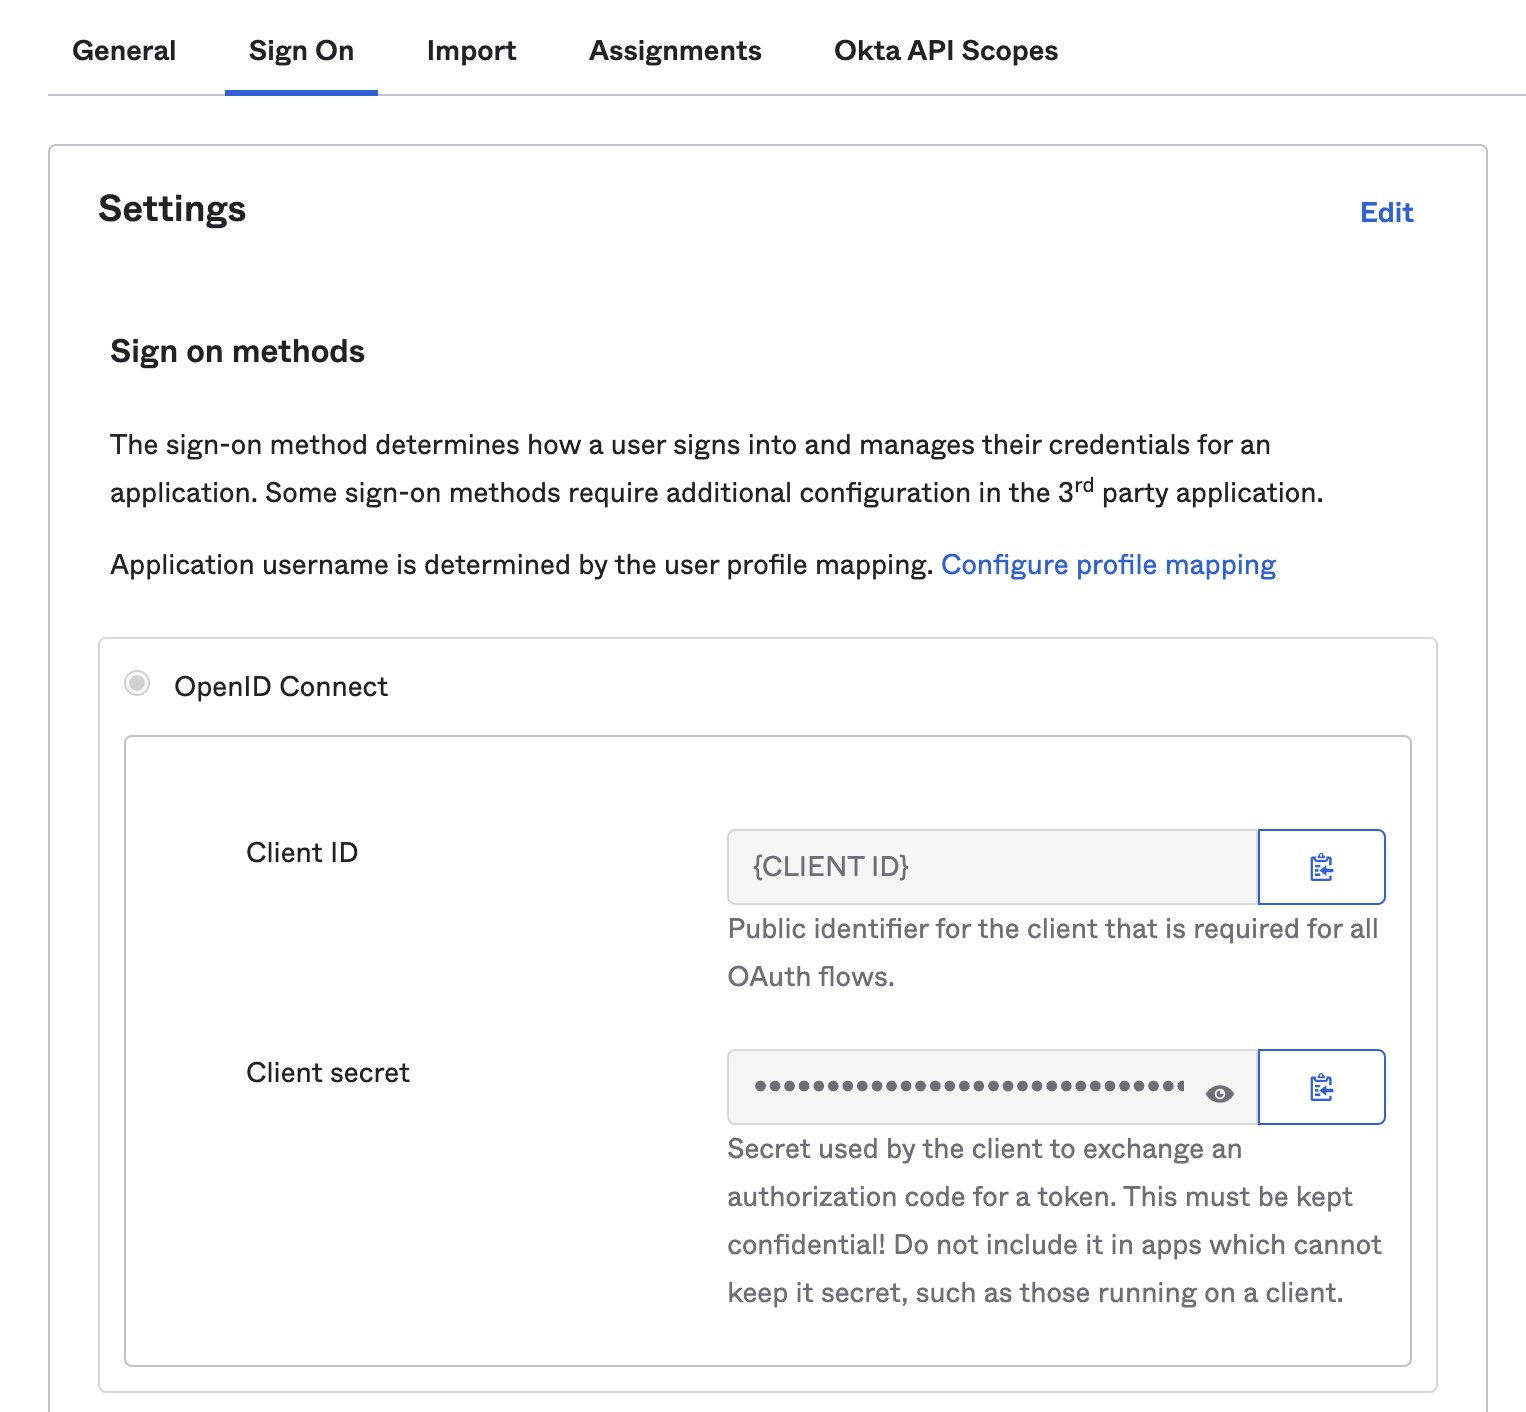
After you install the Cortex application, you'll find an application titled Cortex in your Okta admin console under the "Applications" tab. Click into it.

Select the "Single Sign On" tab and you'll find your new application's Client ID and Client secret .
Granting the proper scopes
Select the "Okta API Scopes" tab and grant Cortex the following scopes:
- okta.groups.read
- okta.profileMappings.read
- okta.users.read
Failure to grant access to these scopes could result in features in Cortex not working as expected.
Auto Sign On
Bypassing the “Sign into Workspace” screen can be done by creating a custom Okta app and adding the following configurations:
- Grant type: Authorization Code
- Redirect URI: https://cortexapp.auth0.com/login/callback
- Initiate login URI: https://app.getcortexapp.com/login?tenantCode=TENANT_CODE